
Table of Contents
- What is a Variable Product?
- Step 1: Go to your “Products” page & click the “Add New” button.
- Step 2: Select “Variable Product” from this Dropdown Menu.
- Step 3: Add Product Title.
- Step 4: Write your Product’s Short Description (this shows on the right side of your product in your Store)
- Step 5: Write your Product’s Long Description (this shows on the bottom of your product in your Store – you can also put images here to further show your product’s details)
- Step 6: Select a single or multiple Categories for your product.
- Step 7: Upload your Product’s Featured Image.
- Step 8: Upload Additional Images for Your Product’s Gallery (OPTIONAL)
- Step 9: Select some Tags for your Product (OPTIONAL)
- Step 10: Go into the “Attributes” tab.
- Step 11: Add an attribute, choose one from the given ones or follow the next step to create an attribute.
- Step 12: Click on “Add”
- Step 13: Give a name to your attribute.
- Step 14: Enter the values you want as your product variations by using the separator “|” (This is not the alphabet “L” or “I”, it’s a symbol on your keyboard)
- Step 15: Please select the check boxes.
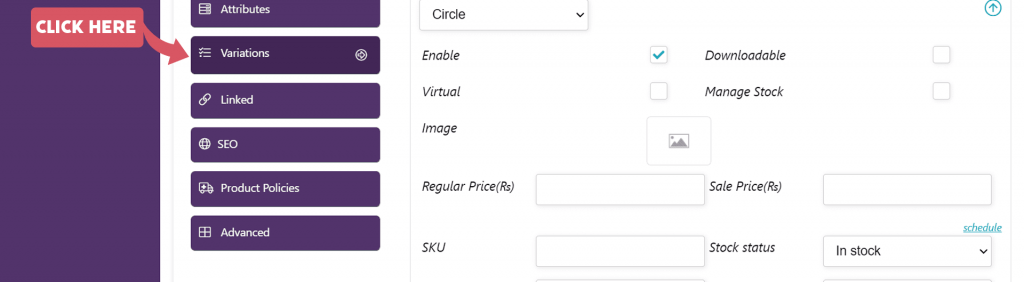
- Step 16: Go into the “Variations” tab.
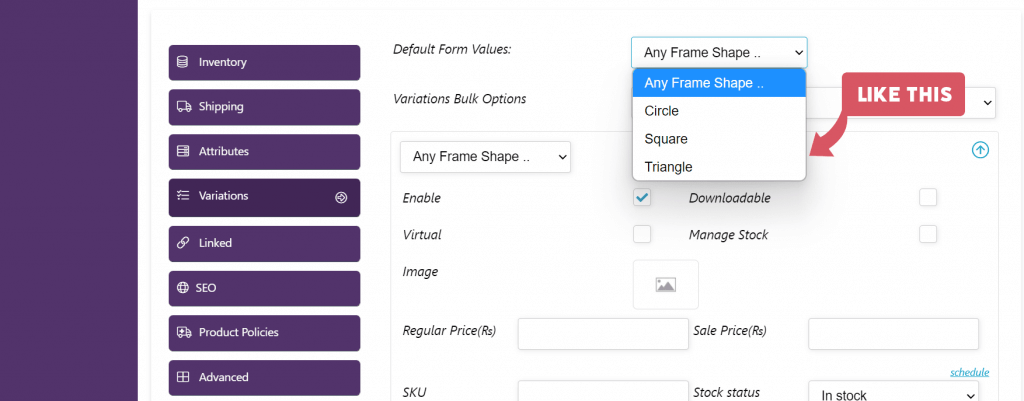
- Step 17: If you have entered your attributes correctly, you will see all the attributes showing up here.
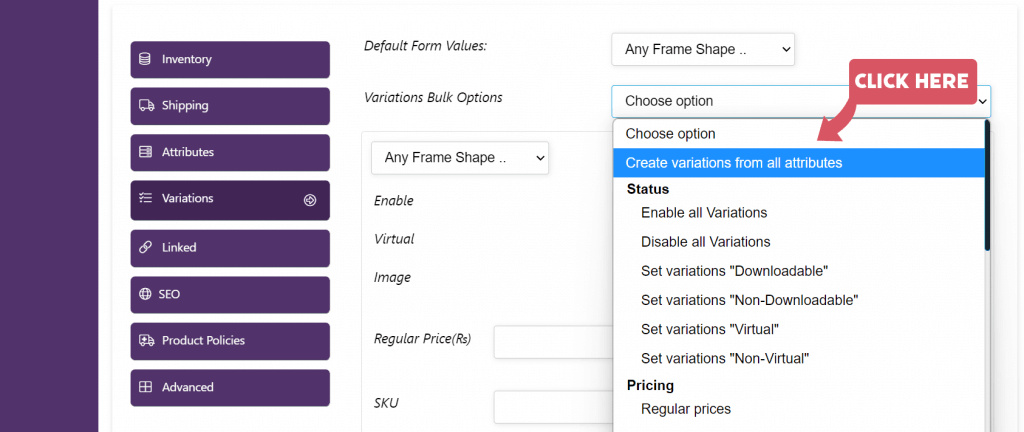
- Step 18: Select “create variations from all attributes”
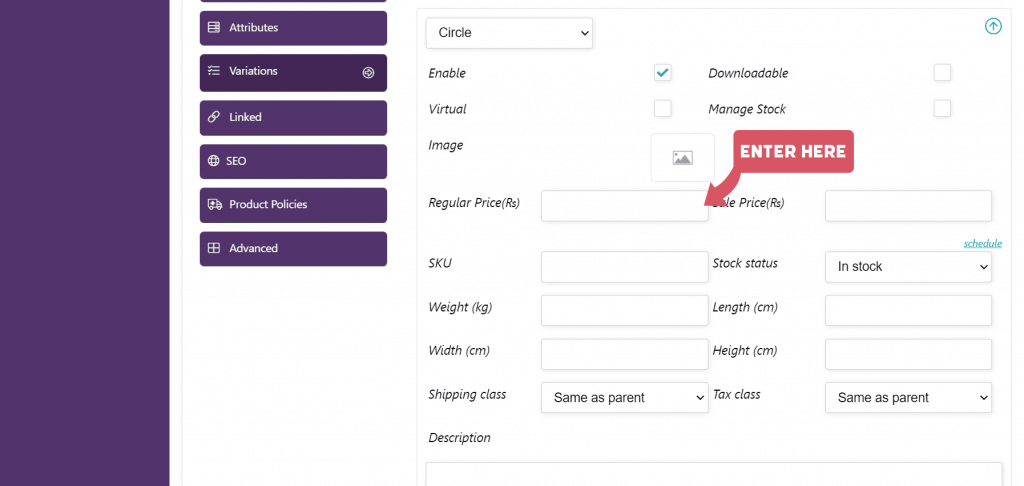
- Step 19: Fill the relevant details of each variation.
- Step 20: Publish the product.
What is a Variable Product? #
A “Variable Product” can be used when you have variations for your product such as size, color, design etc. Let’s add one by following the simple steps below:
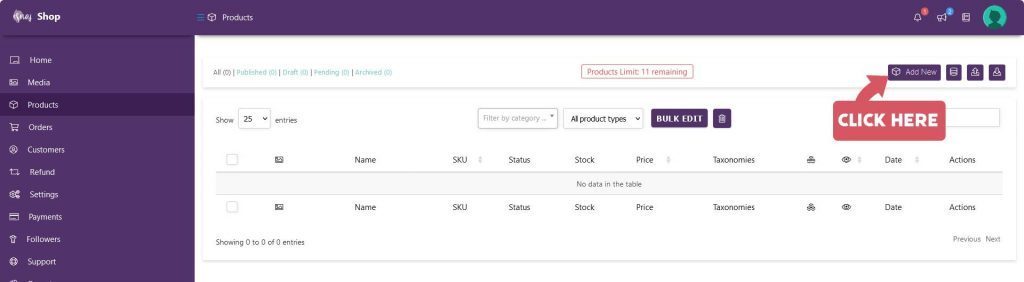
Step 1: Go to your “Products” page & click the “Add New” button. #
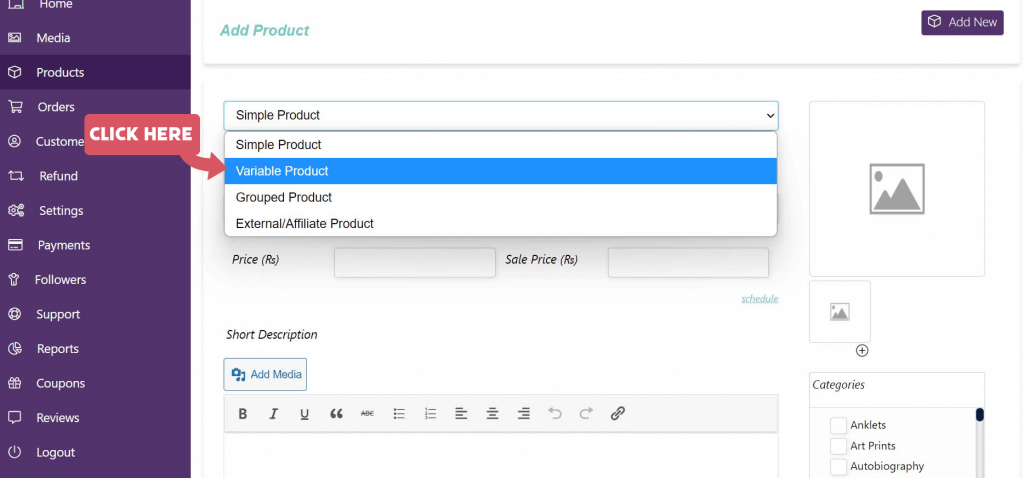
Step 2: Select “Variable Product” from this Dropdown Menu. #
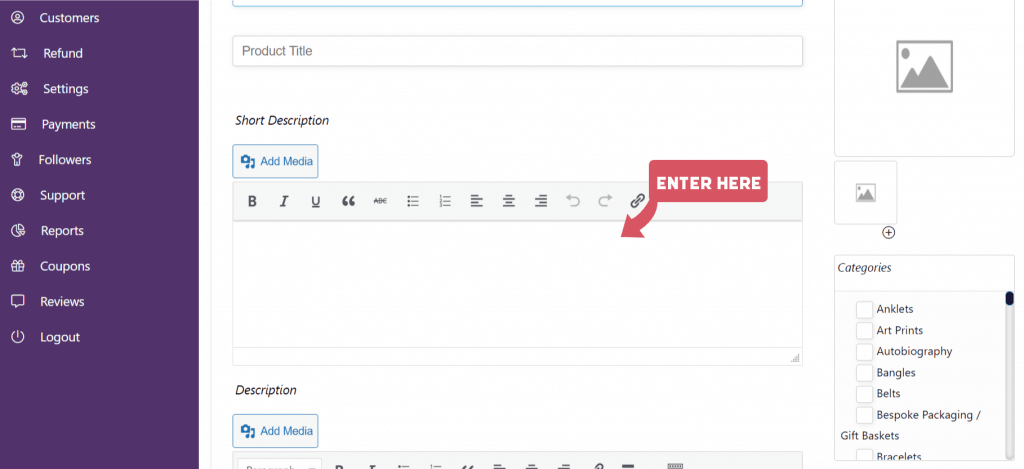
Step 3: Add Product Title. #

Step 4: Write your Product’s Short Description (this shows on the right side of your product in your Store) #
Step 5: Write your Product’s Long Description (this shows on the bottom of your product in your Store – you can also put images here to further show your product’s details) #

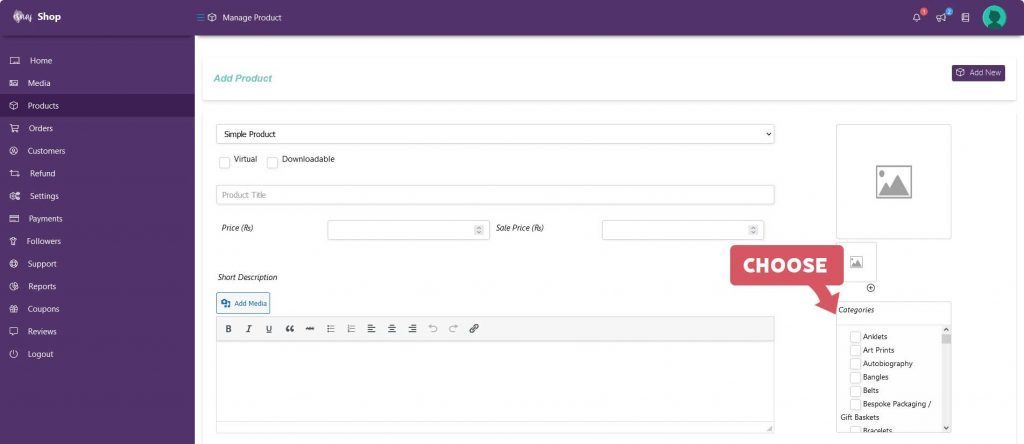
Step 6: Select a single or multiple Categories for your product. #
Step 7: Upload your Product’s Featured Image. #

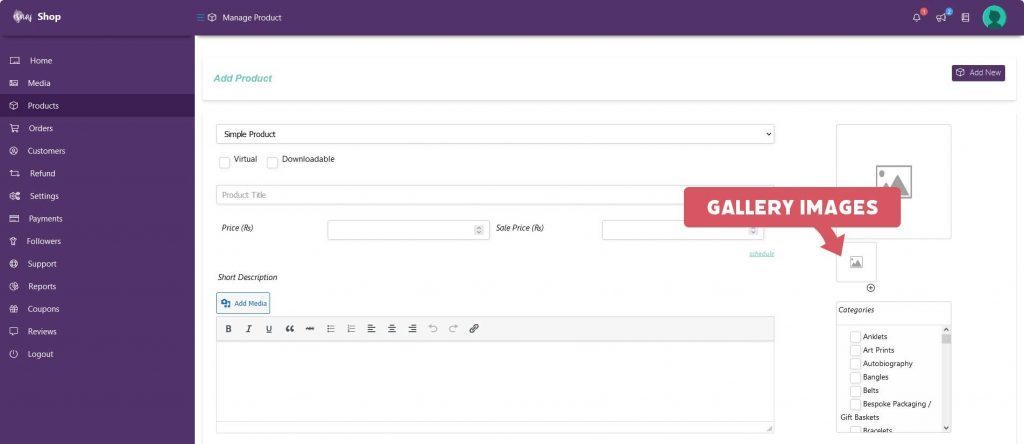
Step 8: Upload Additional Images for Your Product’s Gallery (OPTIONAL) #
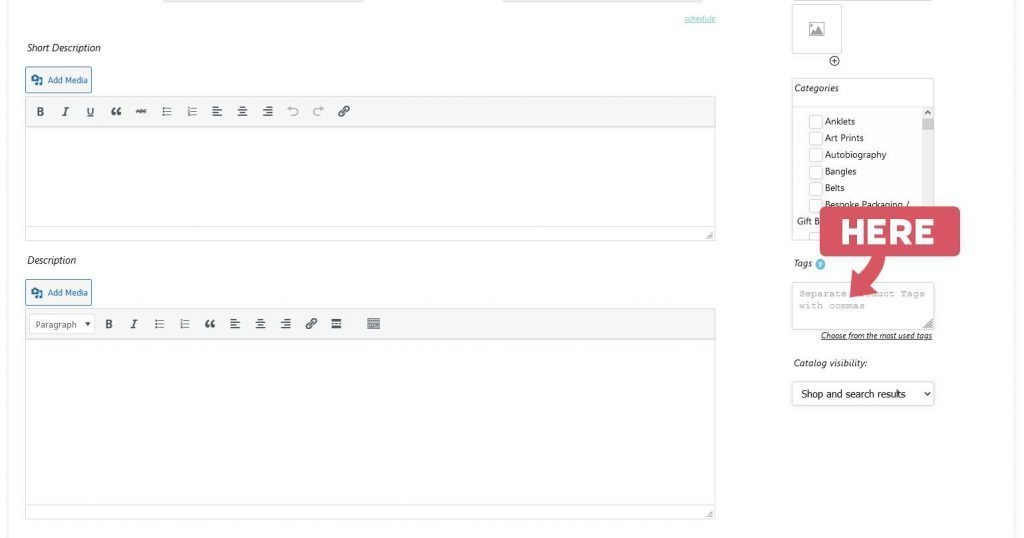
Step 9: Select some Tags for your Product (OPTIONAL) #
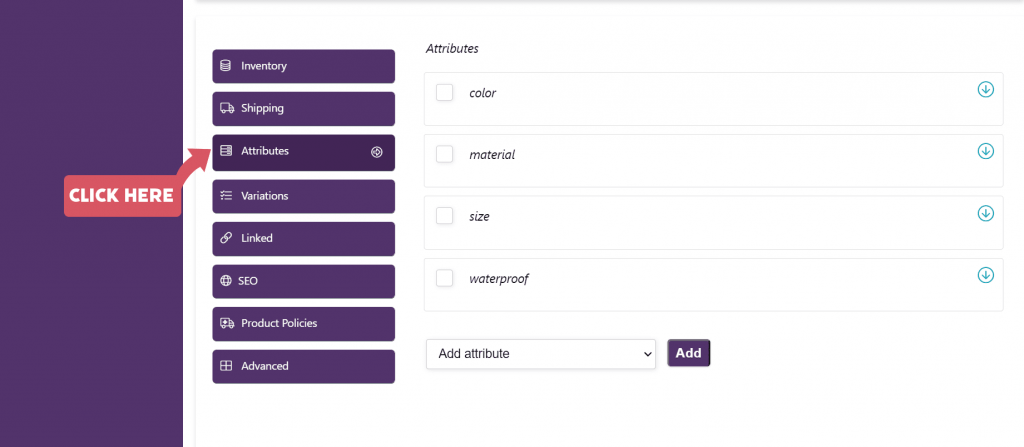
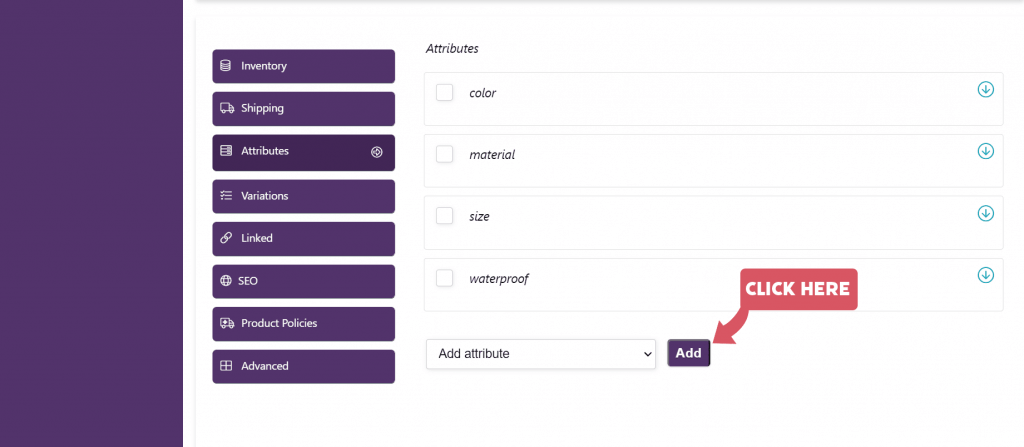
Step 10: Go into the “Attributes” tab. #
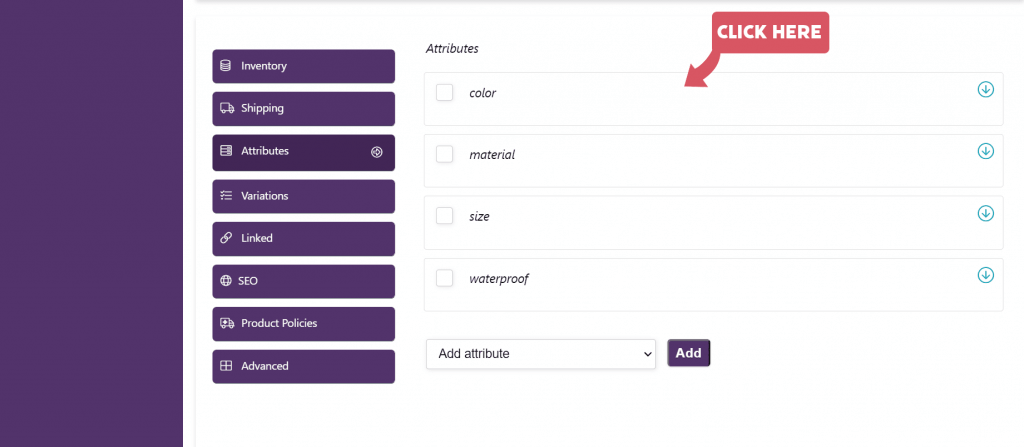
Step 11: Add an attribute, choose one from the given ones or follow the next step to create an attribute. #
Step 12: Click on “Add” #
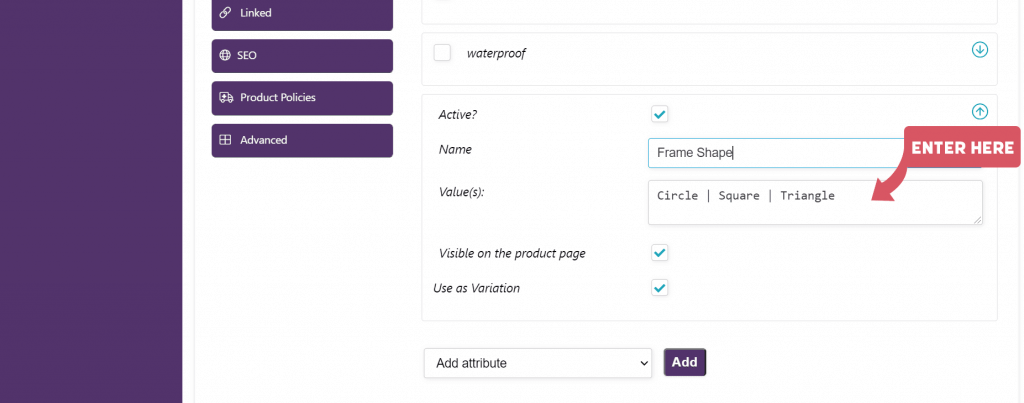
Step 13: Give a name to your attribute. #
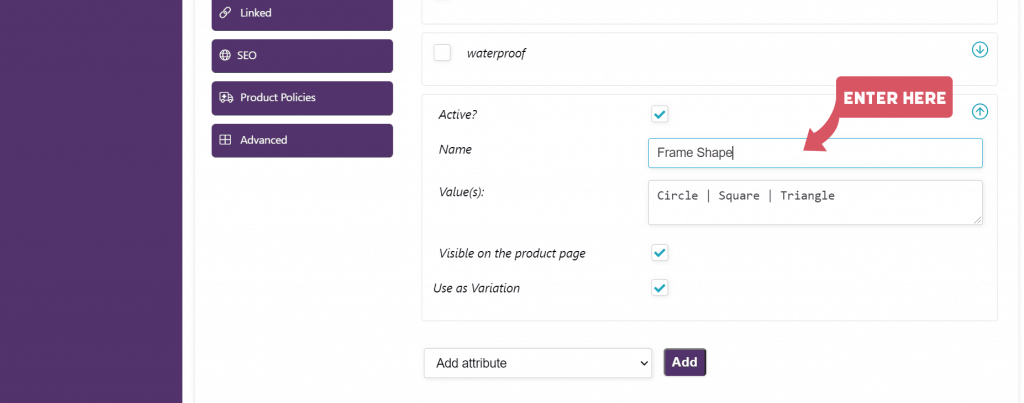
Step 14: Enter the values you want as your product variations by using the separator “|” (This is not the alphabet “L” or “I”, it’s a symbol on your keyboard) #
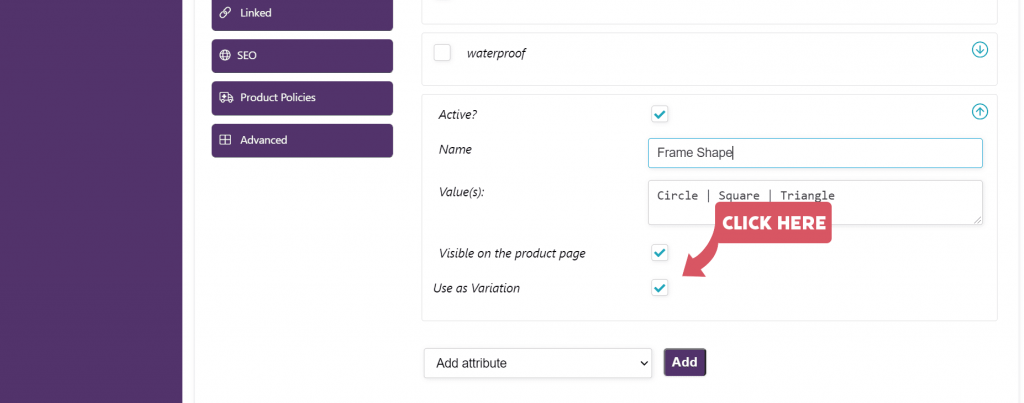
Step 15: Please select the check boxes. #
Step 16: Go into the “Variations” tab. #
Step 17: If you have entered your attributes correctly, you will see all the attributes showing up here. #
Step 18: Select “create variations from all attributes” #
Step 19: Fill the relevant details of each variation. #
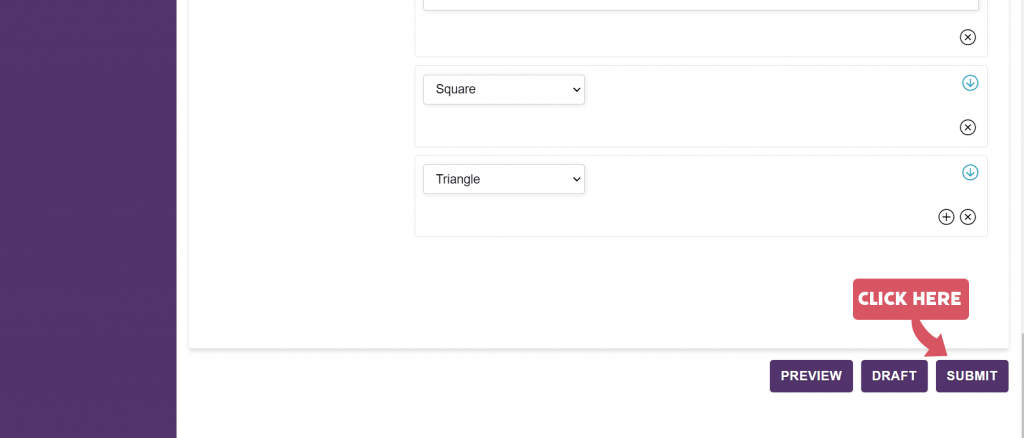
Step 20: Publish the product. #


 No products in the cart.